For a while I've been knitting the body of Vinny V from the pattern in Knit a Monster Nursery by Rebecca Danger (starting on page 69). I finally finished it!
Now I began working on the arms. I tried something new though. I am knitting both at the same time, and oh man it's awesome! I never did this before.
I began by winding 2 separate yarn balls with a ball winder.
I cast on the 12 stitches for each arm onto 2 separate double pointed needles.
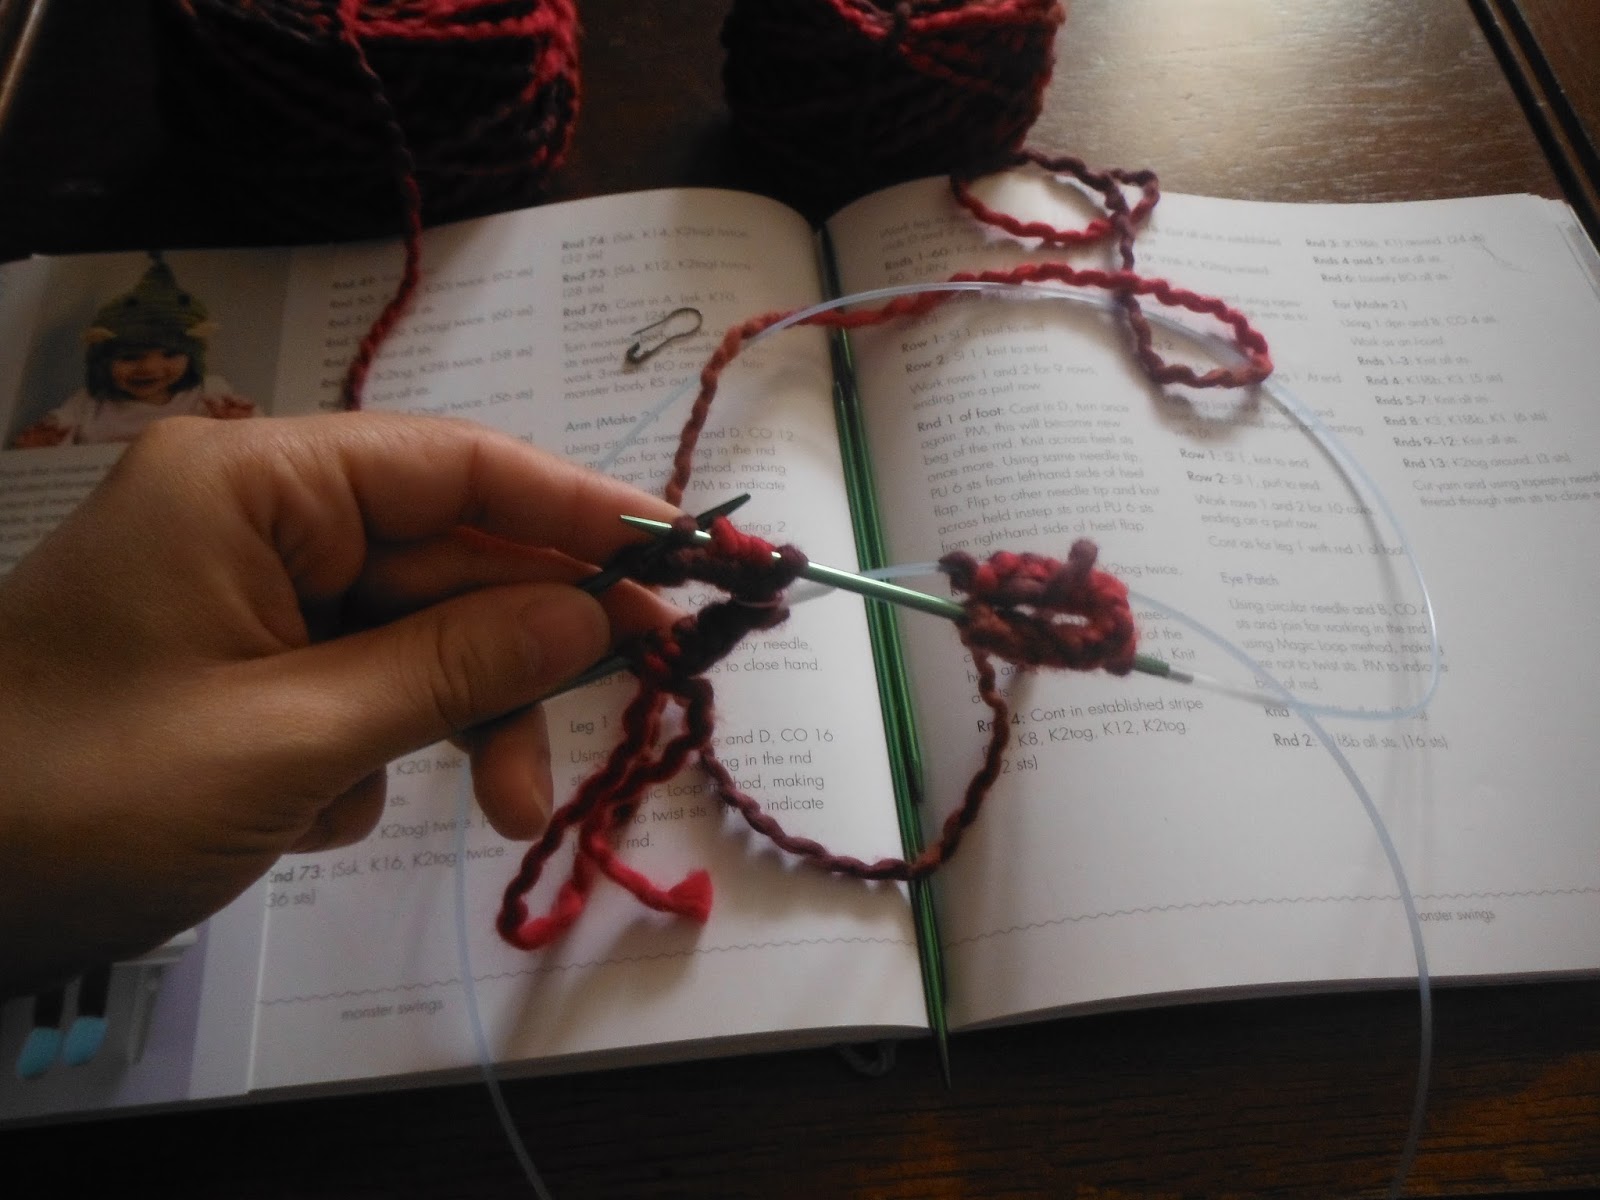
The needle in my hand is a circular needle.
Transfer from the double pointed needle as if slipping a stitch.
Make the magic loop. Divide the stitches in half. At the half point pull the cable through. Make sure the working yarn is on the back needle.
For the second set of cast on stitches, you will be working from the halfway point.
On the back needle that has the working yarn you will place the new half with the new working yarn
Flip the double pointed needle so you can work from the middle and slip the rest onto the front needle of the circular needle.
Both on the circular neeldes
Pull the back needle out to your right so that the stitches wind upon the cable. But don't pull too hard! You need a loop to be coming out the left side of the stitches.
This is after knitting the front stitches of one of the arms.
This is afer knitting the front of both sets.
The needle that the stitches came off of, the one that was in your left hand, push it through the back stitches, turn the work and begin knitting again. Keep in mind not to tangle the two working yarns.
Video coming soon, stay tuned... :)
I didn't make the video with these pictures because this was the very first time trying this.
This method could probably be used for socks, booties and anything that calls for "make 2" (or more). I will be trying out different patterns soon.
Thanks for reading!
Ruthie